Camera
A camera includes a camera device, along with its associated hand-eye calibration relationship and ROI.
Before starting camera configuration, please ensure that the hardware system connection is completed.
Add Camera
Click + on the right side of the camera entry to add a camera.
| Multiple cameras can be added if needed, typically used for camera field of view stitching scenarios. |
Connect Camera and Set Camera Parameters
-
After clicking the camera under the camera entry, select the camera in the right list.
-
Click Open Epic Eye in the upper right corner of the view to enter the Epic Eye software interface.
-
For camera parameter settings, please refer to How to Adjust Parameters.
-
After parameter adjustment is complete, click Back in the upper right corner.
Hand-Eye Calibration
Click Calibration under the camera entry to enter the hand-eye calibration configuration interface.
For detailed hand-eye calibration operation instructions, please refer to Hand-eye calibration description.
Set ROI
ROI (Region of Interest) is a specific area in the data. Setting ROI can improve processing efficiency and accuracy, save resources, etc. The ROI should include the entire area where the target object is located when stationary.
Interface and Operations
Click ROI under the camera entry to enter the ROI setting interface, which mainly consists of the following parts.
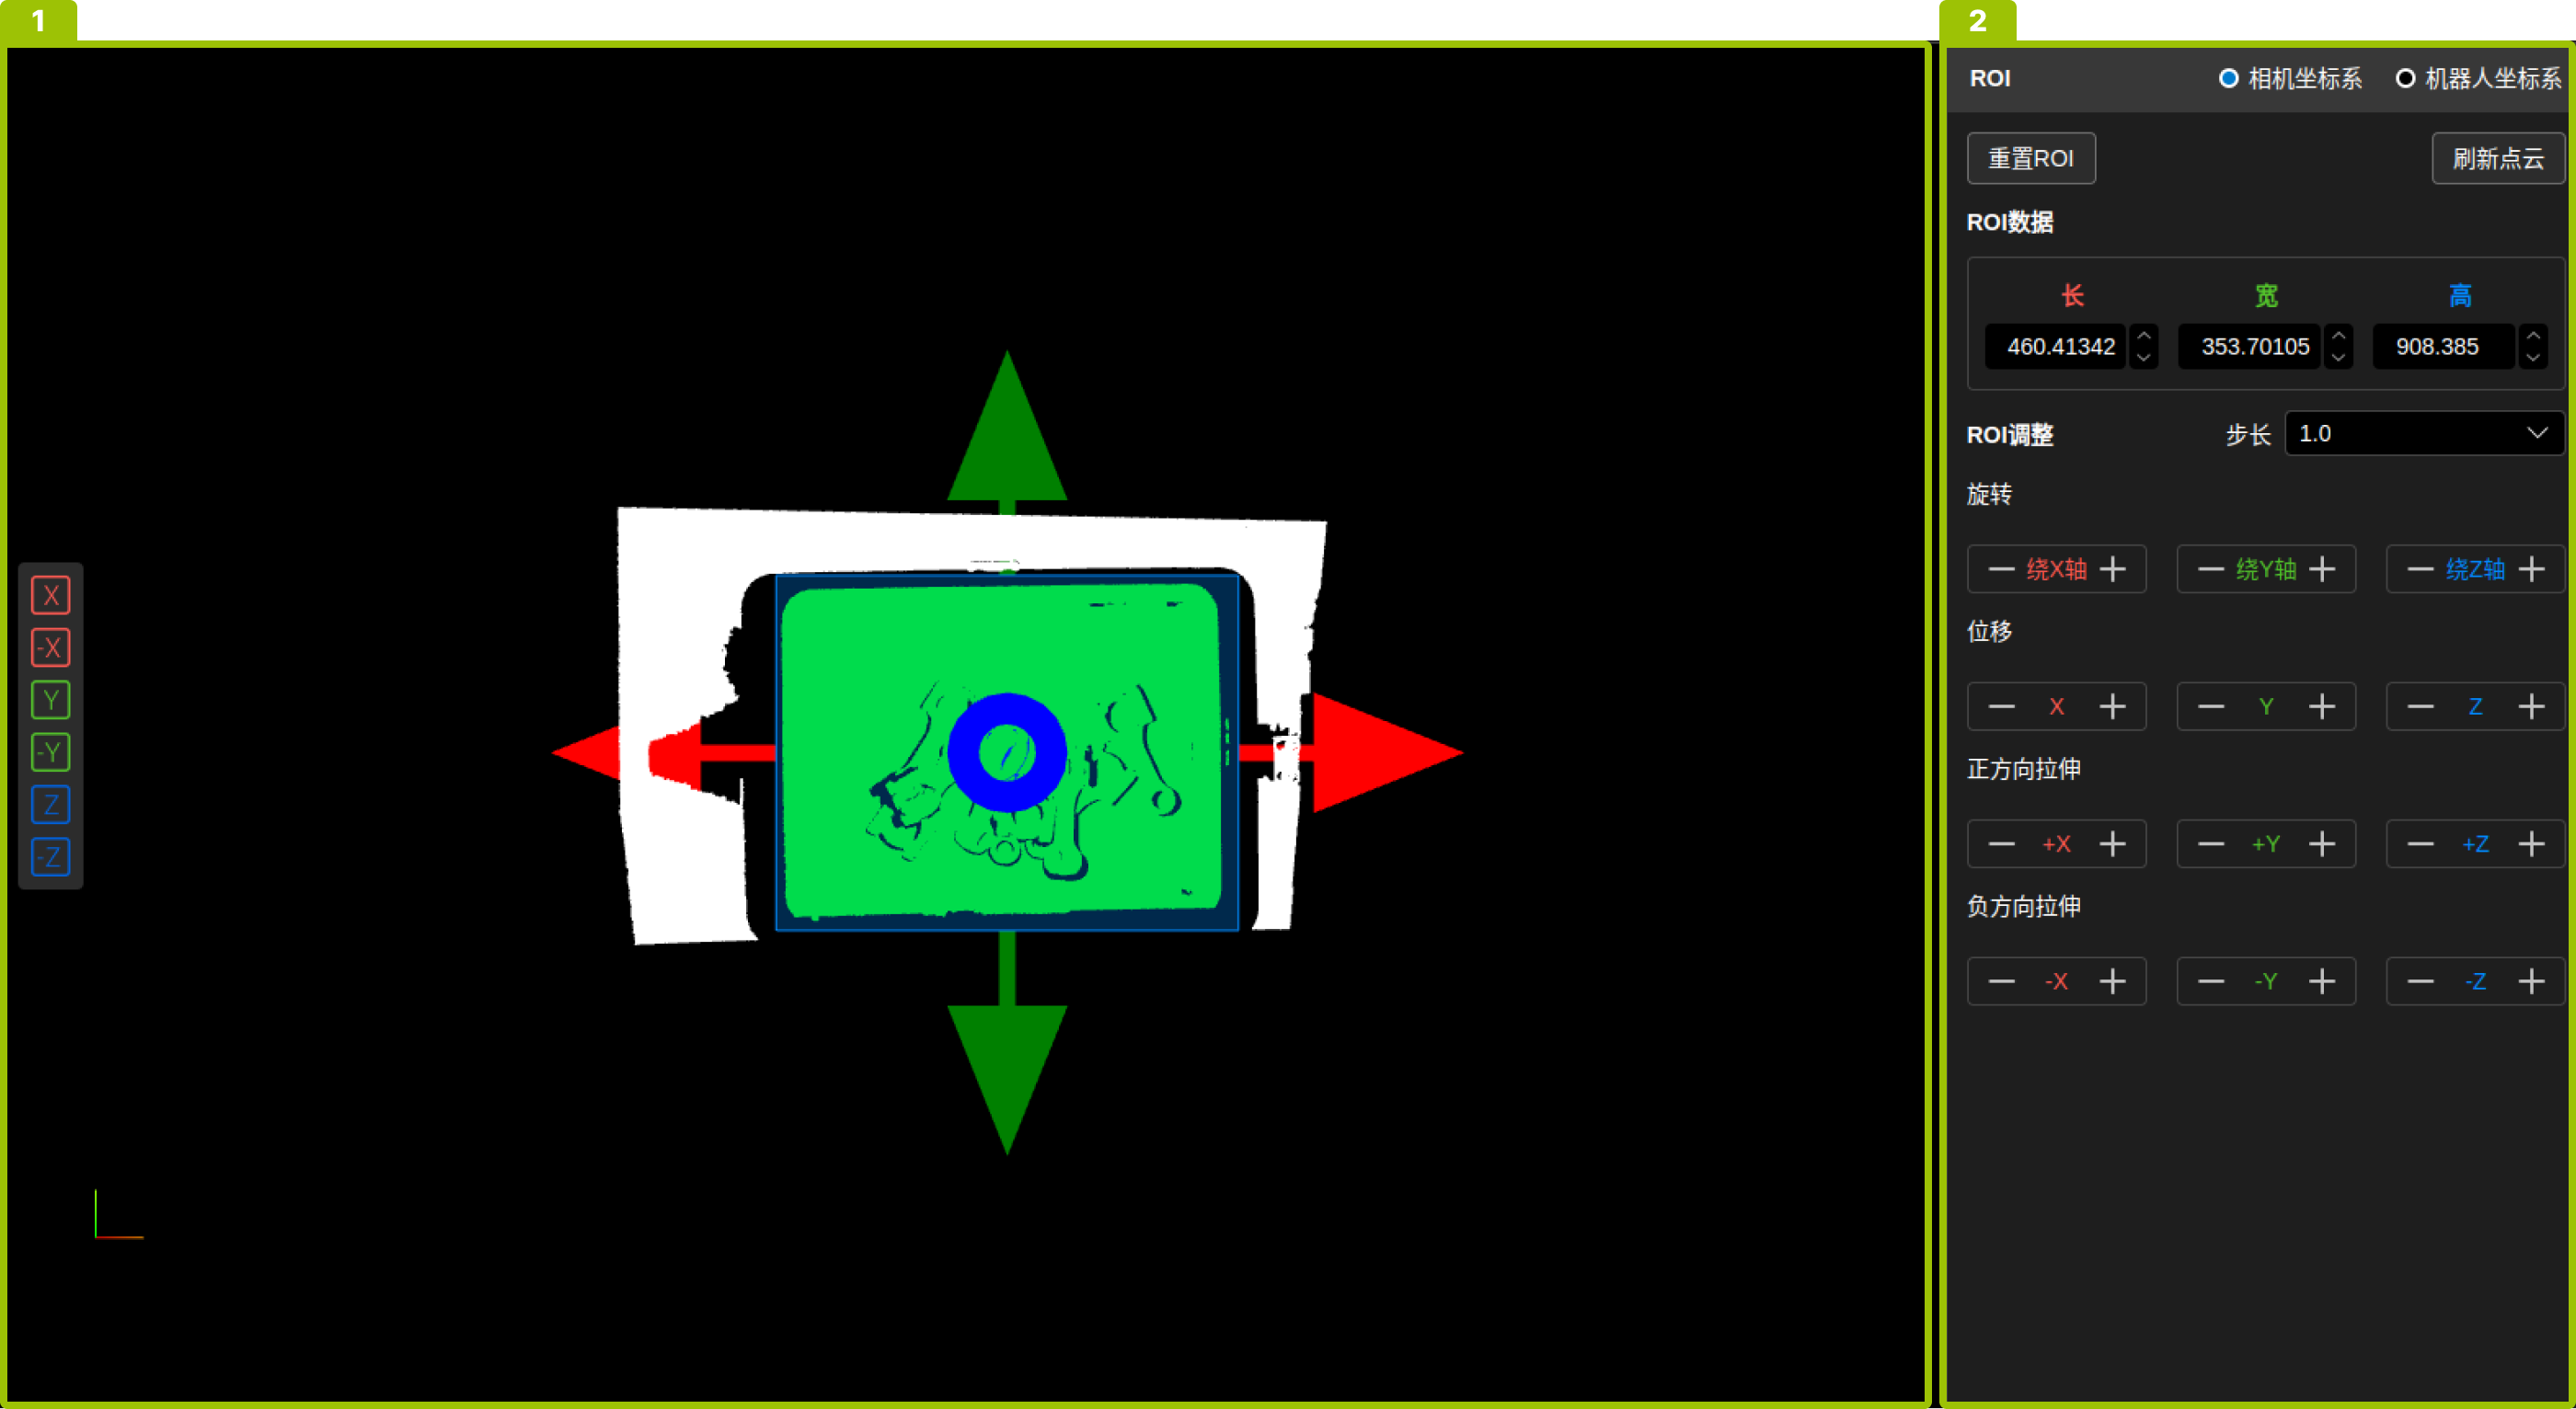
3D Display Area (1)
This area displays the point cloud and ROI, and the following operations can be performed in this area.
-
Adjust View
-
Rotate view: Long press the left mouse button and drag in any direction.
-
Pan view: Long press the right mouse button and drag in any direction.
-
Zoom view: Scroll the mouse wheel.
-
Switch X/Y/Z view: Click ±X/±Y/±Z on the left side of the interface.
-
-
Adjust ROI
Move the mouse pointer to the red/green/blue arrows, long press the left mouse button and drag the arrows to adjust the ROI size and position.
Parameter Settings Area (2)
The following operations can be performed in this area:
-
Reset ROI
Resetting ROI will restore the ROI size and position to the default initial state.
-
Refresh Point Cloud
Refreshing the point cloud will trigger the camera to perform one data acquisition and update the point cloud in the 3D display area.
-
ROI Size Display
The length, width, and height dimensions of the current ROI are displayed in the ROI data bar.
-
ROI Adjustment
-
Step size adjustment: Select the step size in the dropdown bar to the right of the step size. The step size affects the offset when adjusting ROI in a single step.
-
Rotation, translation, and stretch adjustment: Click the corresponding +/- buttons.
-
Adjustment Example
Using the illustration in the operation steps as an example. The adjustment process is as follows:
-
Set ROI Length and Width
-
Click Z to switch to the +Z view.
-
Move the mouse pointer to the red arrow, long press the left mouse button and drag the arrow to adjust the ROI length.
-
Move the mouse pointer to the green arrow, long press the left mouse button and drag the arrow to adjust the ROI width.

-
-
Set ROI Height
-
Click Y to switch to the +Y view.
-
Move the mouse pointer to the blue arrow, long press the left mouse button and drag the arrow to adjust the ROI height.

-
-
Set ROI Angle
In the parameter settings area, click the - around the Y-axis to adjust the ROI angle.
