Laser L、Laser L V2S
2D Parameters
2D parameters affect the quality of the 2D image. The brightness of the 2D image should be appropriate, with clear surface features of the target object, and should not be too bright or too dark.
You can adjust the image quality of the 2D image by setting the exposure time and gain under the 2D parameters group.
| When confirming the 2D exposure parameters, you can open the real-time view and gradually adjust the 2D parameters while observing the changes in image quality until achieving the desired effect. |
Resolution
The Laser L V2S camera supports two resolution modes:
-
8MP mode: Provides higher resolution image capture
-
2MP mode: Provides faster capture speed
You can select the appropriate resolution mode in the software interface according to your actual application needs.
Resolution Mode |
Suitable Scenarios |
8MP |
Scenarios requiring high-precision details, such as precision measurement, surface defect detection, etc. |
2MP |
Scenarios requiring fast capture, such as dynamic object detection, real-time monitoring, etc. |
| Under the same lighting conditions, the 2MP mode captures faster than the 8MP mode, but with less image detail. It is recommended to choose the appropriate resolution mode according to your actual application needs. |
Exposure Time
-
Description:
Exposure time is the duration for which the camera’s sensor is exposed to light for each frame. It determines the level of exposure to light, thus affecting the brightness of the image. The longer the exposure time, the brighter the image; the shorter the exposure time, the darker the image.
-
Range: 0.1~1000ms
-
Adjustment Instructions:
Adjust according to the on-site environment. Generally, longer exposure times are used in darker environments, and shorter exposure times are used in brighter environments. The 2D image should not be too bright or too dark, and the surface features of the target object should be clearly visible.
-
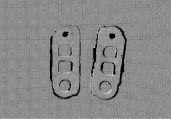
Example:
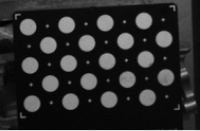
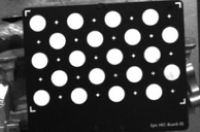
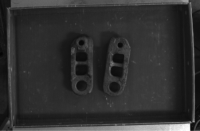
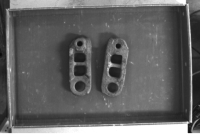
The following content only demonstrates the effect of changing exposure time on the image. In actual situations, image effects will vary depending on the scene and parameter settings.
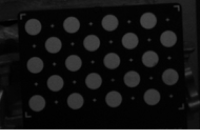
20
50
100
Gain
-
Description:
Gain is the multiple by which the signal is amplified during image acquisition. It is used to increase the brightness of the image.
-
Range: 0~24dB
-
Adjustment Instructions:
When the environment is dark, the image gain can be appropriately increased, but it should be noted that increasing the brightness will increase the noise in the image. Therefore, it is necessary to adjust it according to the actual situation to minimize the impact of noise while ensuring the brightness.
-
If the on-site image is dark and the 2D exposure time is already appropriately increased, you can increase the camera gain to enhance the image brightness.
-
If there is a high requirement for speed, you can reduce the exposure time and increase the gain to ensure adequate brightness while maintaining the necessary speed.
-
-
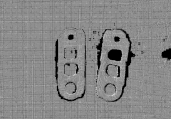
Example:
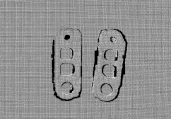
The following content only demonstrates the effect of changing gain on the image. In actual situations, image effects will vary depending on the scene and parameter settings.
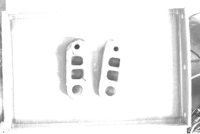
0
6
12
24
3D Parameters
3D parameters affect the quality of the point cloud and depth map. The point cloud and depth map should contain complete surface information of the object.
You can adjust the quality by setting the exposure time, gain, and exposure parameter group in the 3D parameters.
Resolution
Laser L series cameras support two resolution modes:
-
8MP mode: Provides higher resolution image capture
-
2MP mode: Provides faster capture speed
You can select the appropriate resolution mode in the software interface according to your application requirements.
Resolution Mode |
Application Scenarios |
8MP |
Scenarios requiring high-precision details, such as precision measurement and surface defect detection |
2MP |
Scenarios requiring fast capture, such as dynamic object detection and real-time monitoring |
| Under the same lighting conditions, the 2MP mode provides faster capture speed than the 8MP mode, but with relatively fewer image details. It is recommended to select the appropriate resolution mode based on your actual application requirements. |
Exposure Time
-
Description:
Exposure time affects the density, quality, and noise level of the point cloud. Longer exposure times produce denser point clouds but may decrease quality and increase noise; shorter exposure times improve quality and reduce noise but may result in lower point cloud density. Exposure times that are too short or too long can lead to missing point cloud information.
-
Range: 20~200ms
-
Adjustment Instructions:
Adjust according to the characteristics of the workpiece. Dark-colored workpieces typically use longer exposure times, while light-colored workpieces typically use shorter exposure times.
-
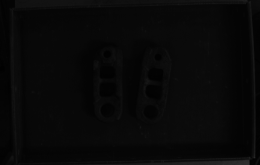
Example:
The following content only demonstrates the effect of changing exposure time on the point cloud. In actual situations, point cloud effects will vary depending on the scene and parameter settings.
20
30
50
Gain
-
Description:
Gain affects the brightness, contrast, and noise level of the point cloud. High gain increases brightness and contrast but may increase noise; low gain has the opposite effect.
-
Range: 0~24dB
-
Adjustment Instructions:
Select an appropriate gain to balance brightness and noise, ensuring point cloud quality.
3D Exposure Parameter Group
To obtain a complete and high-quality point cloud of an object, especially when the object has both dark and light parts, you can use the 3D exposure parameter group. This involves taking multiple exposures, each with different combinations of exposure time and gain, and then merging the point cloud results from these different exposure conditions to get the final complete point cloud image.
Up to three groups of 3D exposure parameters can be used, with different parameter values set for each group. Increasing the number of exposure parameter groups will increase the capture time, so minimize the number of exposures while ensuring image quality.
General Settings
Laser Projection Partition
-
Description:
Controls the camera to scan each sub-area sequentially and integrate the data from each sub-area to generate complete data. Using laser partitioning for capture can reduce ambient light interference, thereby improving image quality and signal-to-noise ratio.
-
Parameters: 1 partition, 2 partitions, 3 partitions, 4 partitions
-
Adjustment Instructions:
The more partitions, the higher the data quality, but the capture time will be correspondingly longer. Please select parameters that can meet the image accuracy and speed requirements according to the actual situation.
Encoding Method
-
Description:
Controls the encoding method of the laser projection system during scanning, mainly affecting scanning speed and accuracy.
-
Parameters: Fast Encoding, Precise Encoding
-
Adjustment Instructions:
Projection Mode
Capture Speed
Point Cloud Quality
Application Scenarios
Fast Encoding
Fast
Low
Non-reflective objects, high speed requirements
Precise Encoding
Slow
High
Non-reflective objects, high point cloud quality requirements
Smoothing Parameters
-
Description:
Point cloud smoothing can be used to reduce depth fluctuations in the point cloud, making it closer to the real object surface, but some surface details of the object will be lost.
-
Parameters: Off, Weak, Medium, Strong, Super Strong
-
Adjustment Instructions:
-
The higher the point cloud smoothing intensity, the more surface details of the object will be lost; the lower the intensity, the fewer surface details will be lost.
-
The higher the point cloud smoothing intensity, the longer the calculation time; the lower the intensity, the shorter the calculation time.
-
Point Cloud Filling
-
Description:
Used to fill gaps in the point cloud.
-
Parameters: Off, Weak, Medium, Strong, Super Strong
-
Adjustment Instructions: The higher the point cloud filling strength, the more complete the generated surface point cloud of the object will be.
Noise Filtering
-
Description:
Used to clean up noise in the point cloud data, specifically those points that are isolated from the target point cloud.
-
Parameters: Off, Weak, Medium, Strong, Super Strong
-
Adjustment Instructions: The noise filtering strength determines the intensity of cleaning noise in the point cloud. The higher the strength, the more noise is removed; the lower the strength, the fewer points are removed.
LED Fill Light
-
Description:
When enabled, the camera will turn on the LED during capture to provide better lighting conditions, helping to improve image quality.
-
Adjustment Instructions:
In low-light environments where image quality cannot be improved even by adjusting exposure time and image gain, consider enabling the LED fill light function.
-
Example:
The following content only demonstrates the effect of LED fill light on the image. In actual situations, image effects will vary depending on the scene and parameter settings.
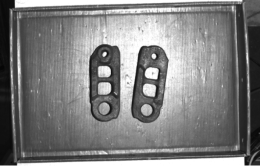
Not Enabled
Enabled