Epic Eye Laser L
Safety Instructions
Safety Statement
-
Before using this product, please read the product manual and correctly understand the related information in the precautions. Failure to comply with the stipulated precautions may result in equipment damage or serious injury or death.
-
Transfer will not assume any legal responsibility for personal safety accidents or property losses caused by non-compliance with the contents of this manual or improper operation of the product.
Precautions
-
Avoid using this camera in environments with excessive dust, strong electromagnetic interference, direct sunlight, or outside the specified temperature and humidity range.
-
Do not directly look at the projection beam during camera operation to avoid eye injury.
-
Ensure the camera window is clean. If cleaning is necessary, use a lint-free cloth.
-
Do not install, disassemble, or clean the camera while it is powered on.
-
Avoid subjecting the camera to severe impacts or drops during transportation and installation.
-
If any abnormal conditions are detected (such as unusual noises, smells, or smoke), immediately disconnect the power and perform an inspection.
-
Do not modify the camera or its accompanying power cable.
Packing List
Upon unboxing, please check the camera and its accessories for any damage, rust, or dents, and verify against the packing list to ensure all materials are complete. If you find any damage, rust, or dents on the camera or its accessories, or if the actual items do not match the packing list, please contact Transfer.
Technical Specifications
Technical Parameters
System Parameters |
Baseline Length |
400mm |
Recommended Working Distance |
1200mm~3000mm |
|
Optimal Working Distance |
||
Near Field of View |
1200mm×1000mm@1.2m |
|
Far Field of View |
3000mm×2600mm@3m |
|
Z-Axis Accuracy |
||
Pixel Count |
300万 |
|
Precision |
0.32@2.4m,0.08@2.4m |
|
Accuracy Error |
<0.15% |
|
Typical Acquisition Time |
0.9s~2.4s |
|
Power Supply |
24V ⎓ 5A |
|
Hardware Parameters |
Dimensions (L*W*H) |
495mm×115mm×100mm |
Installation Method |
Fixed Installation |
|
Computing Unit |
NVIDIA Jetson TX2 |
|
Communication Interface |
Gigabit Ethernet |
|
Light Source |
Blue (450nm) Laser |
|
2D Camera |
Black and White |
|
Environmental Parameters |
Operating Temperature Range |
-10℃~45℃ |
Working Humidity |
20%~90% RH non-condensing |
|
Protection Level |
IP65 |
|
Cooling Method |
Passive |
|
Weight |
3.66kg |
|
Storage Temperature |
-20℃~70℃ |
|
Storage Humidity |
20%~90% RH non-condensing |
If there are any changes, no further notice will be given!
Installation and Connection
Installing the Camera
|
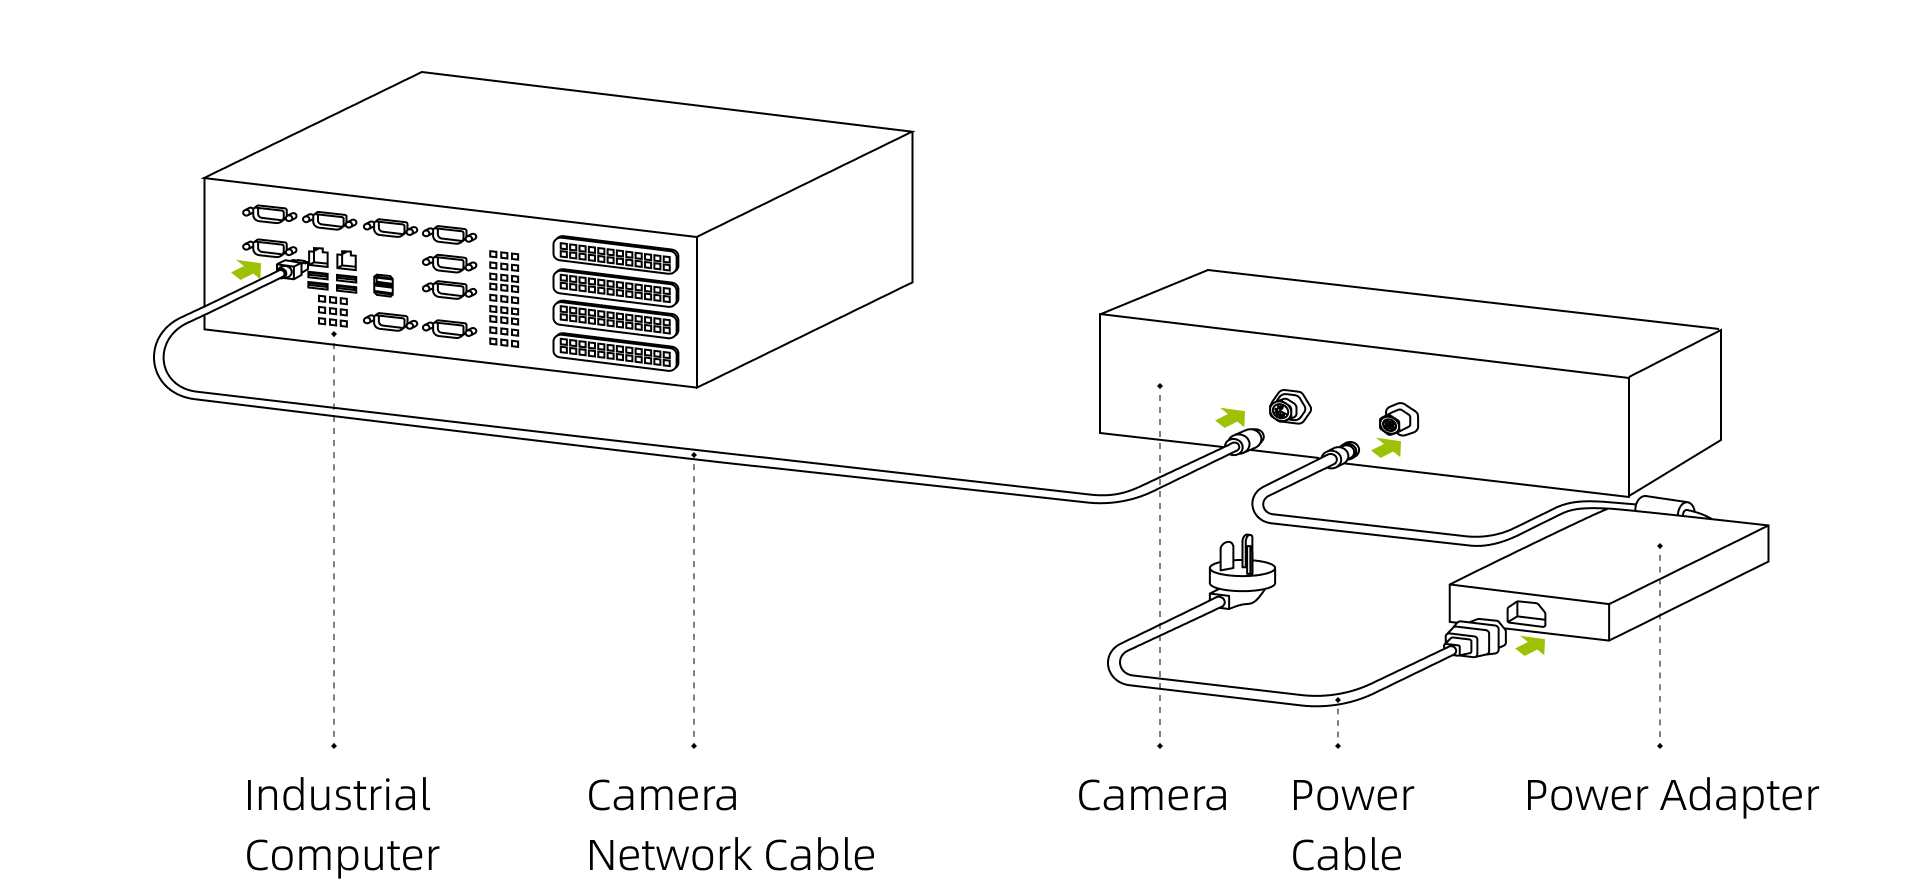
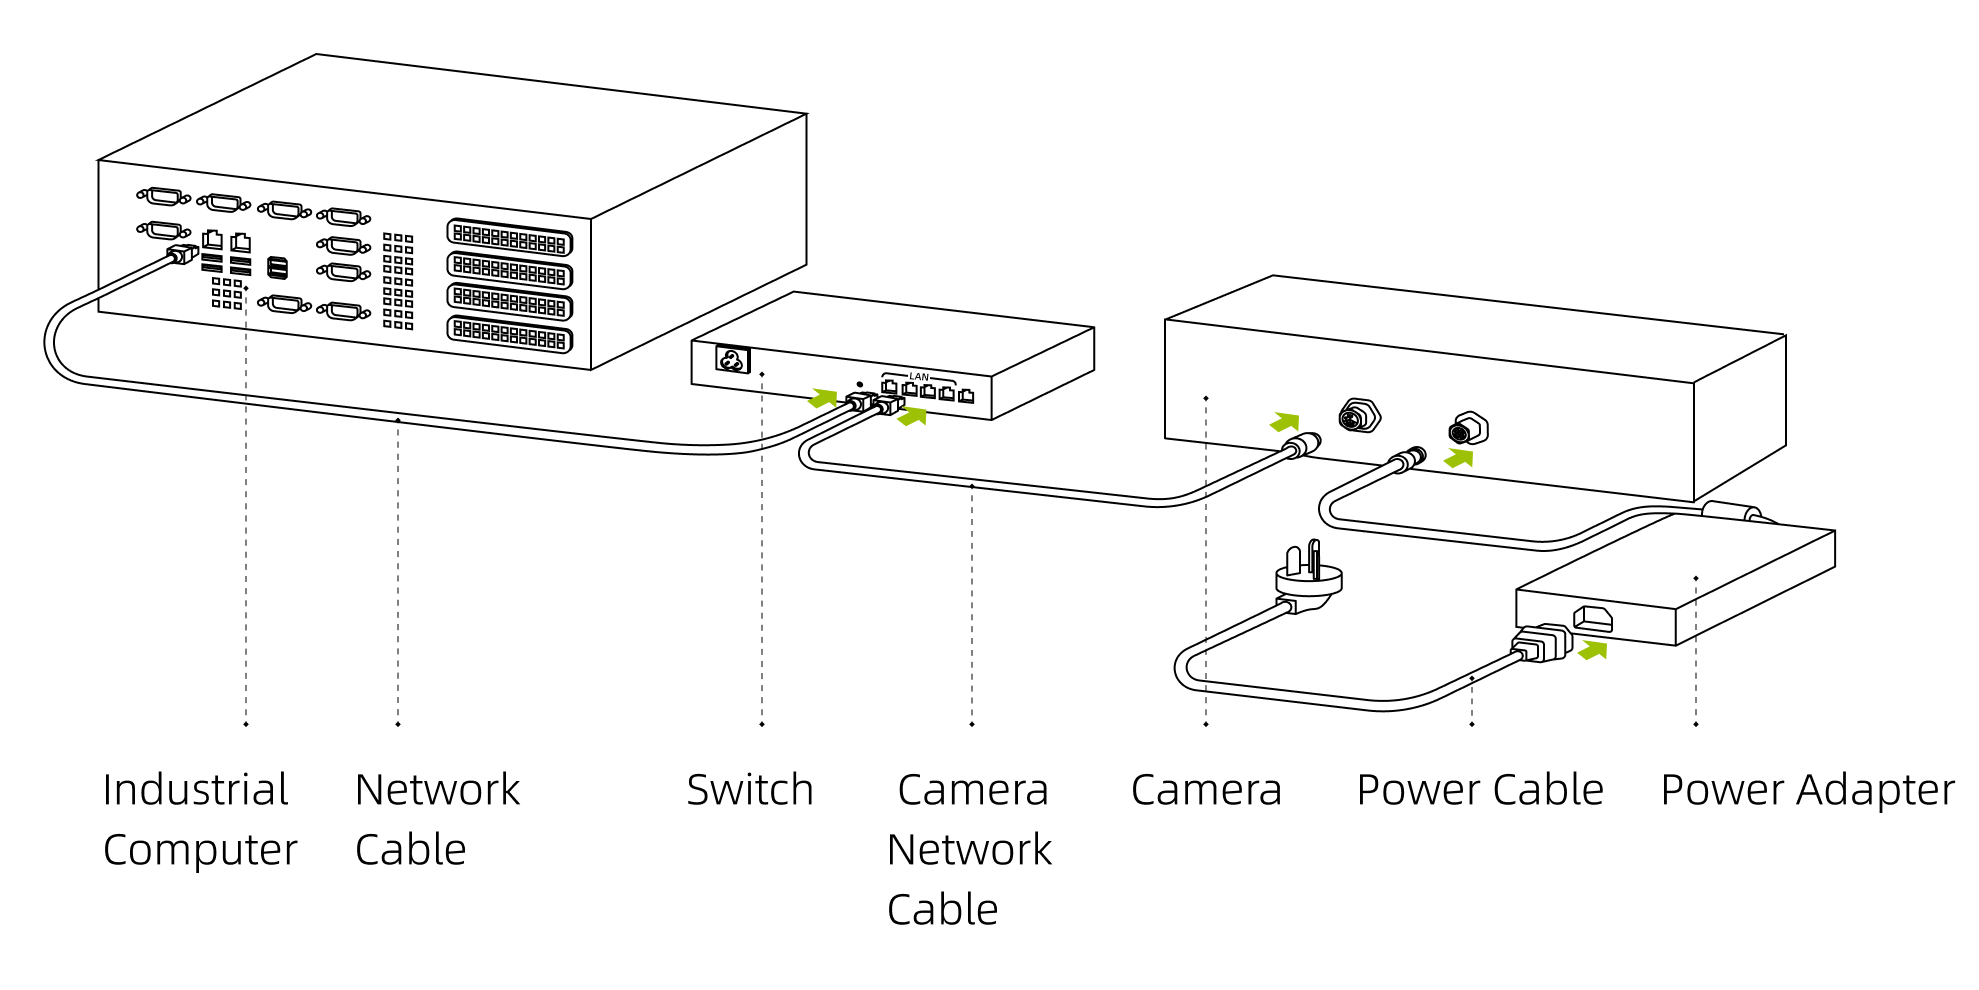
Connecting Cables
Connection Instructions
-
Do not connect or disconnect cables while powered on. Ensure all cable connections are complete before turning on the power.
-
Align the plug and socket, then slowly tighten; avoid using excessive force when connecting or disconnecting.
-
It is recommended to use cable ties to secure the camera’s network cable, power adapter, and power cable.
-
When connecting via a router, ensure all network cables are plugged into the LAN ports of the router.
Maintenance and Care
-
Regularly check the camera body for damage, ensure screws are intact and not missing, and inspect the power cable for aging or damage. If any abnormalities are found, please contact Transfer Technology.
-
Clean the camera regularly. Use a clean, soft cloth to wipe the camera body; use a lint-free cloth with lens cleaner or glass cleaner to gently wipe the camera lens to avoid scratching.
Legal and Compliance


Disclaimer
For any personal safety incidents or property losses caused by the user’s failure to comply with safety regulations, improper operation of the camera, or unauthorized modifications to the camera, power cables, etc., Transfer will not bear any legal responsibility.