How to Get and Set the Camera IP
You can use Camera IP Management Tool or Router Configuration Tool to query and set the camera IP address.
Camera IP Management Tool
Whether the camera is connected directly to the industrial computer or connected to the industrial computer through a router, you can use Camera IP Management Tool to query and modify the camera IP address.
Install the Camera IP Management Tool
Ubuntu
Ubuntu performs the following steps to install and start the tool:
-
Enter the following command in the terminal to install the Camera IP Management Tool.
sudo apt update sudo apt install epiceye-searchtool -
Start the Camera IP Management Tool.
Search for epiceye-searchtool in the application list and click the corresponding icon to start the Camera IP Management Tool.
-
View the IP address of the corresponding camera in the Camera IP column.
Windows
For Windows, follow the steps below to install and start the tool:
-
Download the EpicEyeSearchTool installation package.
-
Double-click the downloaded software installation file (.exe file), set the installation path in the installation wizard, and then click Install and wait for the installation to complete.
-
After the installation is complete, click the EpicEyeSearchTool icon on the desktop to start the camera IP management tool.
Set the Camera IP
Set a Static Camera IP
| The camera IP is dynamically allocated by default. In order to prevent the router from reallocating the IP address to the camera in the event of a power outage or other abnormal conditions and to ensure the stable use of the camera, you can add a static IP to the camera. |
Follow the steps below to set a static camera IP:
-
Start the Camera IP Management Tool.
-
Click
 in the Modify IP column.
 -
In the Modify Camera IP window:
-
Set the IP allocation type to Static IP.
-
Enter the IP address.
-
Click Confirm.
-
Router Configuration Tool
When the camera is connected to the industrial computer through a router, query and modify the camera IP in the router configuration interface.
Confirm the Camera IP
Get the confirmed IP address in the router configuration interface. The steps are as follows:
-
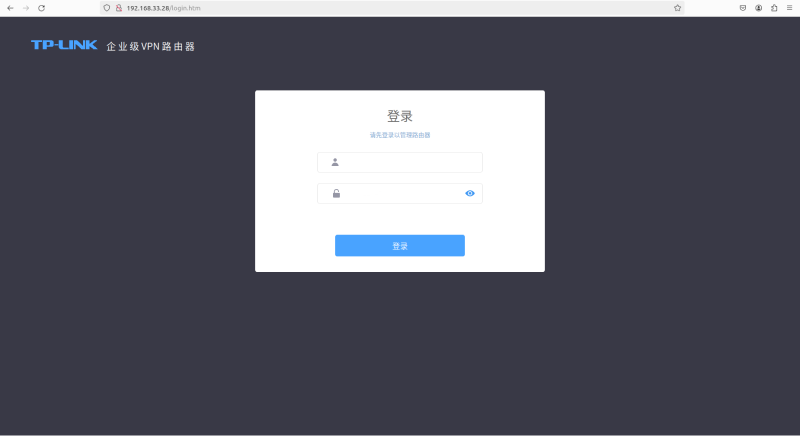
Open the browser and enter tplogin.cn or the default IP address of the router 192.168.1.1 in the address bar.
-
In the router login interface, enter the account and password, and click Login.
-
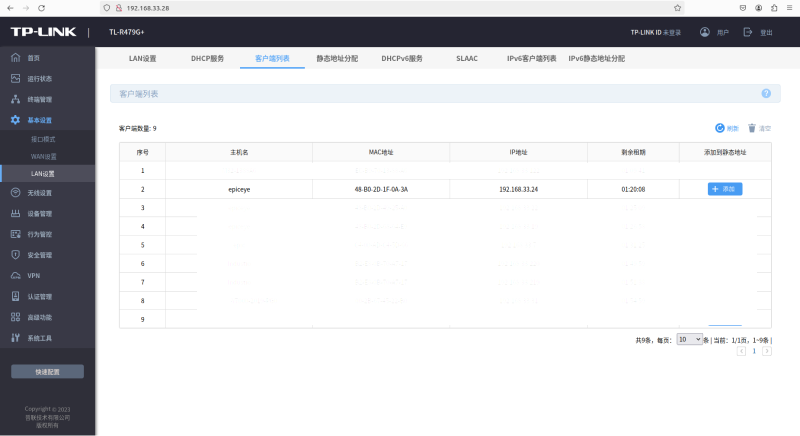
Click .
In this list, you can confirm the camera IP address and industrial computer IP address.

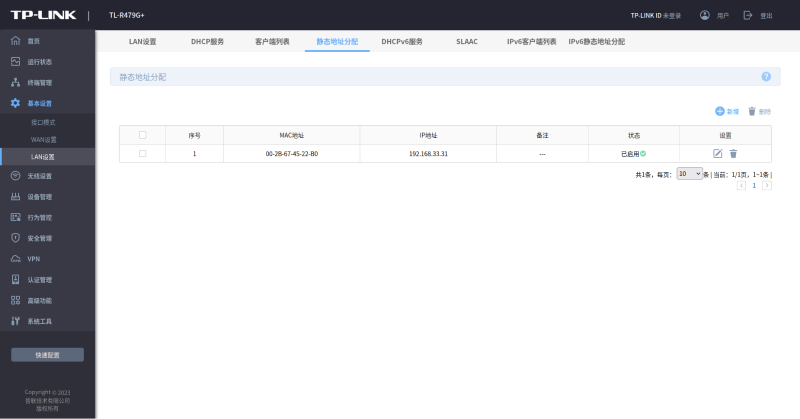
Set the Camera IP
The camera IP is dynamically allocated by default. In order to prevent the router from reallocating the IP address to the camera in the event of a power outage or other abnormal conditions and to ensure the stable use of the camera, you can add a static IP to the camera.
-
Find the corresponding camera in the client list of the router configuration interface.
-
Click Add on the right.
-
In the static address allocation, you can view and modify the added static IP address.